Lighting Techniques Tutorial Series - Part 02.
Welcome to Part 2 of my Lighting Technique Tutorial series. In this part we will go through an Interior Scene with two cameras. There are many things I would like to explain about multi camera setups, but first of all you should watch the video on top of this post.
It’s clear that working with one camera is way more easier than rolling with several cameras at the same time, because you can light for one exact angle and Focal Length. Shooting with more than one camera means it has to be executed quite carefully. The two Operators have to move their cameras precisely, as they can sometimes see light, camera and grip equipment in the safe area of their Viewfinder.
In this specific scene we had a wide shot on a Dolly Track with Camera A and a Medium Shot of the two actors with Camera B. After this we shot the two close ups of the actors simultaneously. The two cameras are always rolling at the same time.
Information about the Project
Film: Strawberries in Spring
Director: Marco Serafini
Director of Photography: Sebastian Wiegärtner, BVK
Gaffer: Wolfgang Erdmann
Cast: Richard Walsh, Zoe Moore
Location: Cornwall, United Kingdom
Camera: 2x ARRI Alexa Plus
Lenses: ZEISS Standard Primes
But why using more than one camera on a feature film set? First of all, it levels up production value. Perhaps it’s just this single additional shot of Camera B, which makes a scene more appealing. Or it’s just the continuity, because every movement, every behaviour of your actor is in both cameras the same.
It also makes sense, when you have scenes with children, animals, vehicles, stunts, artificial rain etc. Especially when you are working with young Talents, who are not so experienced like Professionals.
But most important: It’s good for your Actors. You can get a medium and a close up at once. And there are times, where you are shooting both close ups simultaneously. It’s very difficult light wise, but it’s well known, that Actors are performing better, when they get their close ups. When shooting in two directions, they all can outperform themselves, because both are more concentrated.
How was this scene lit?
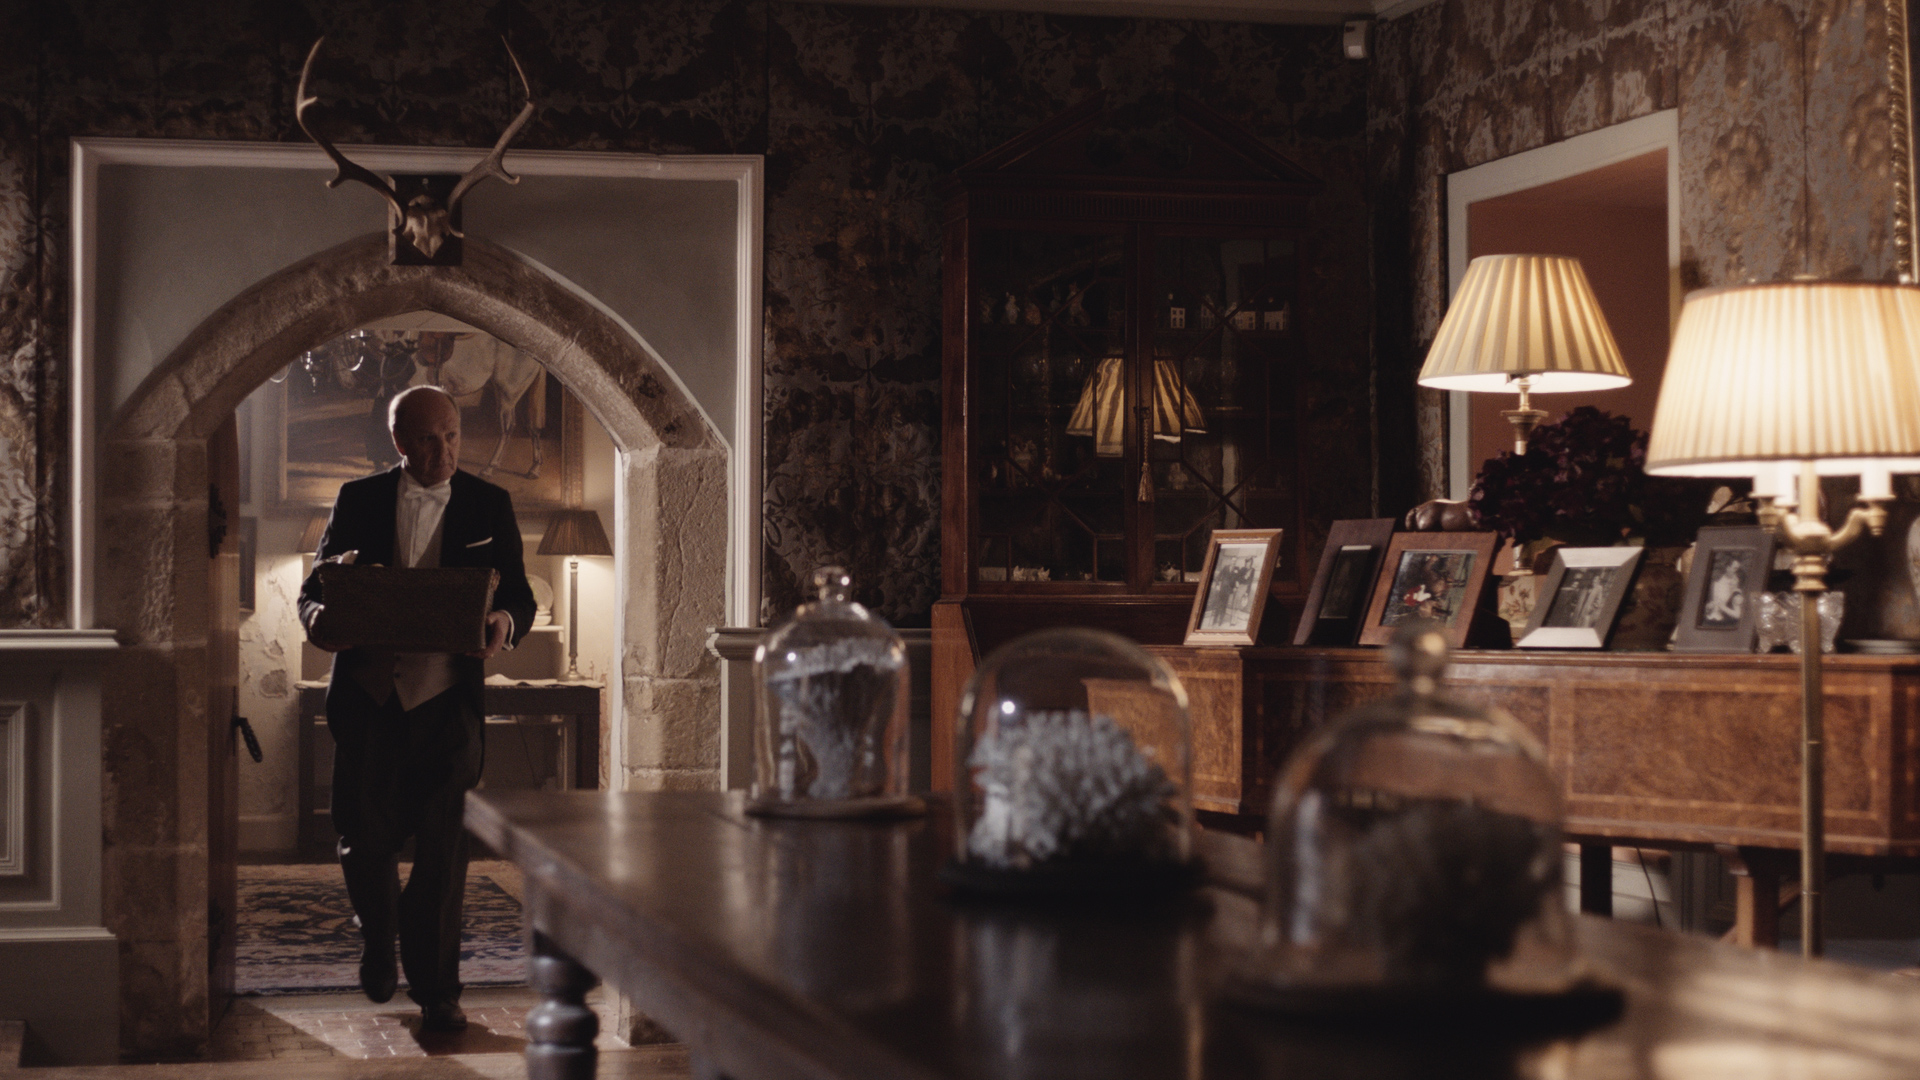
For this specific scene we only used a few lights. Firsts of all we had to black out all the windows on the right and left side of the room, because it’s a Night Interior Scene and we shot it during the Daylight. The room had exactly four practicals. Two in the room where the Butler comes out and two where the main acting takes place. Most of the time I’m replacing the bulbs of the practicals, because they have too much power or they are not soft enough. My lighting crew also builds custom hats for the bulbs with Black Wrap to control the light coming out of the practicals. Sometimes I also add White Diffusion on the bulbs of the Practicals. In this location we did not have any light from the ceiling, so we only had the Practicals and two additional lights. We used a Rifa Tungsten 1000W Softlight with Grid and a simple ARRI 800W Tungsten Light.
The ARRI 800W was spotted and used for the Butler as rim light, when he comes out of the room at the beginning of the scene. There was also a tiny amount of haze in the back room. The Rifa Tungsten 1000W Softlight was used as a fill for the wide and medium shot. When we did the close ups we moved the Rifa next to one Practical, to intensify this light.
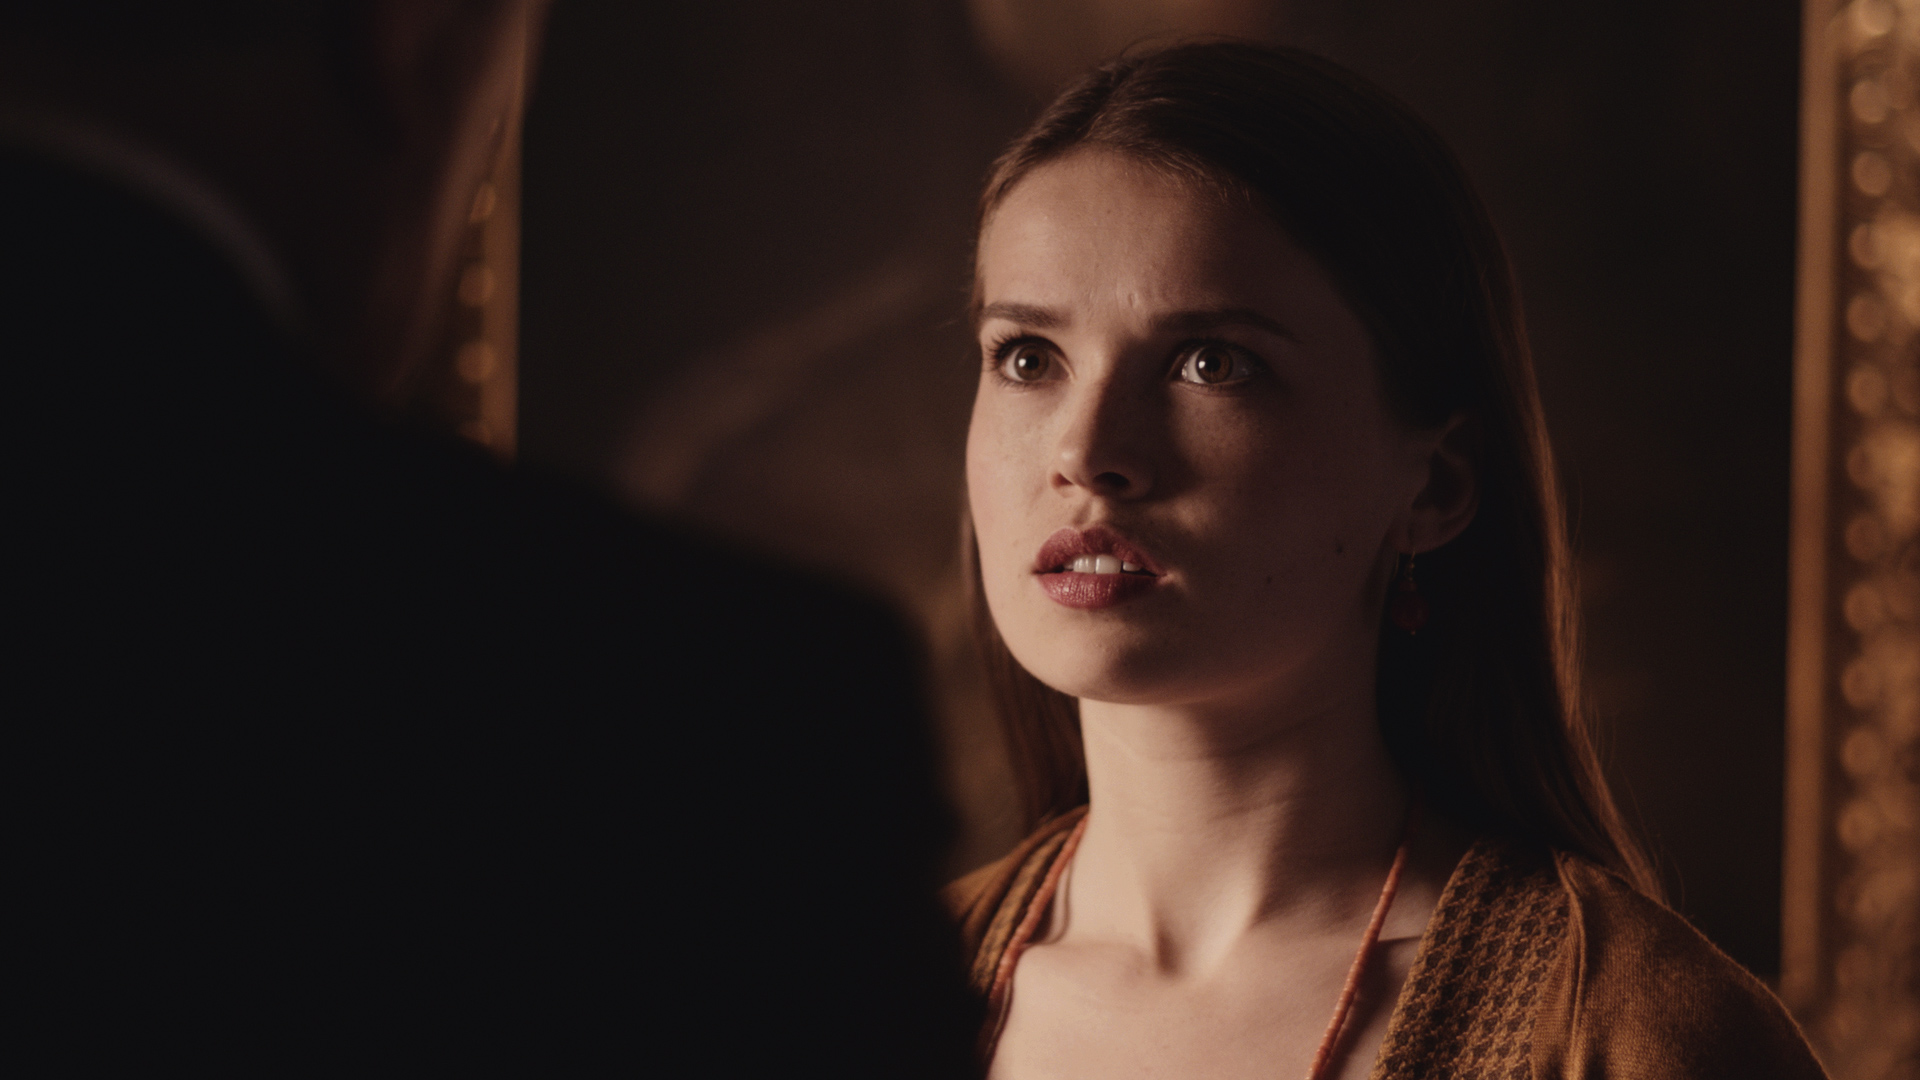
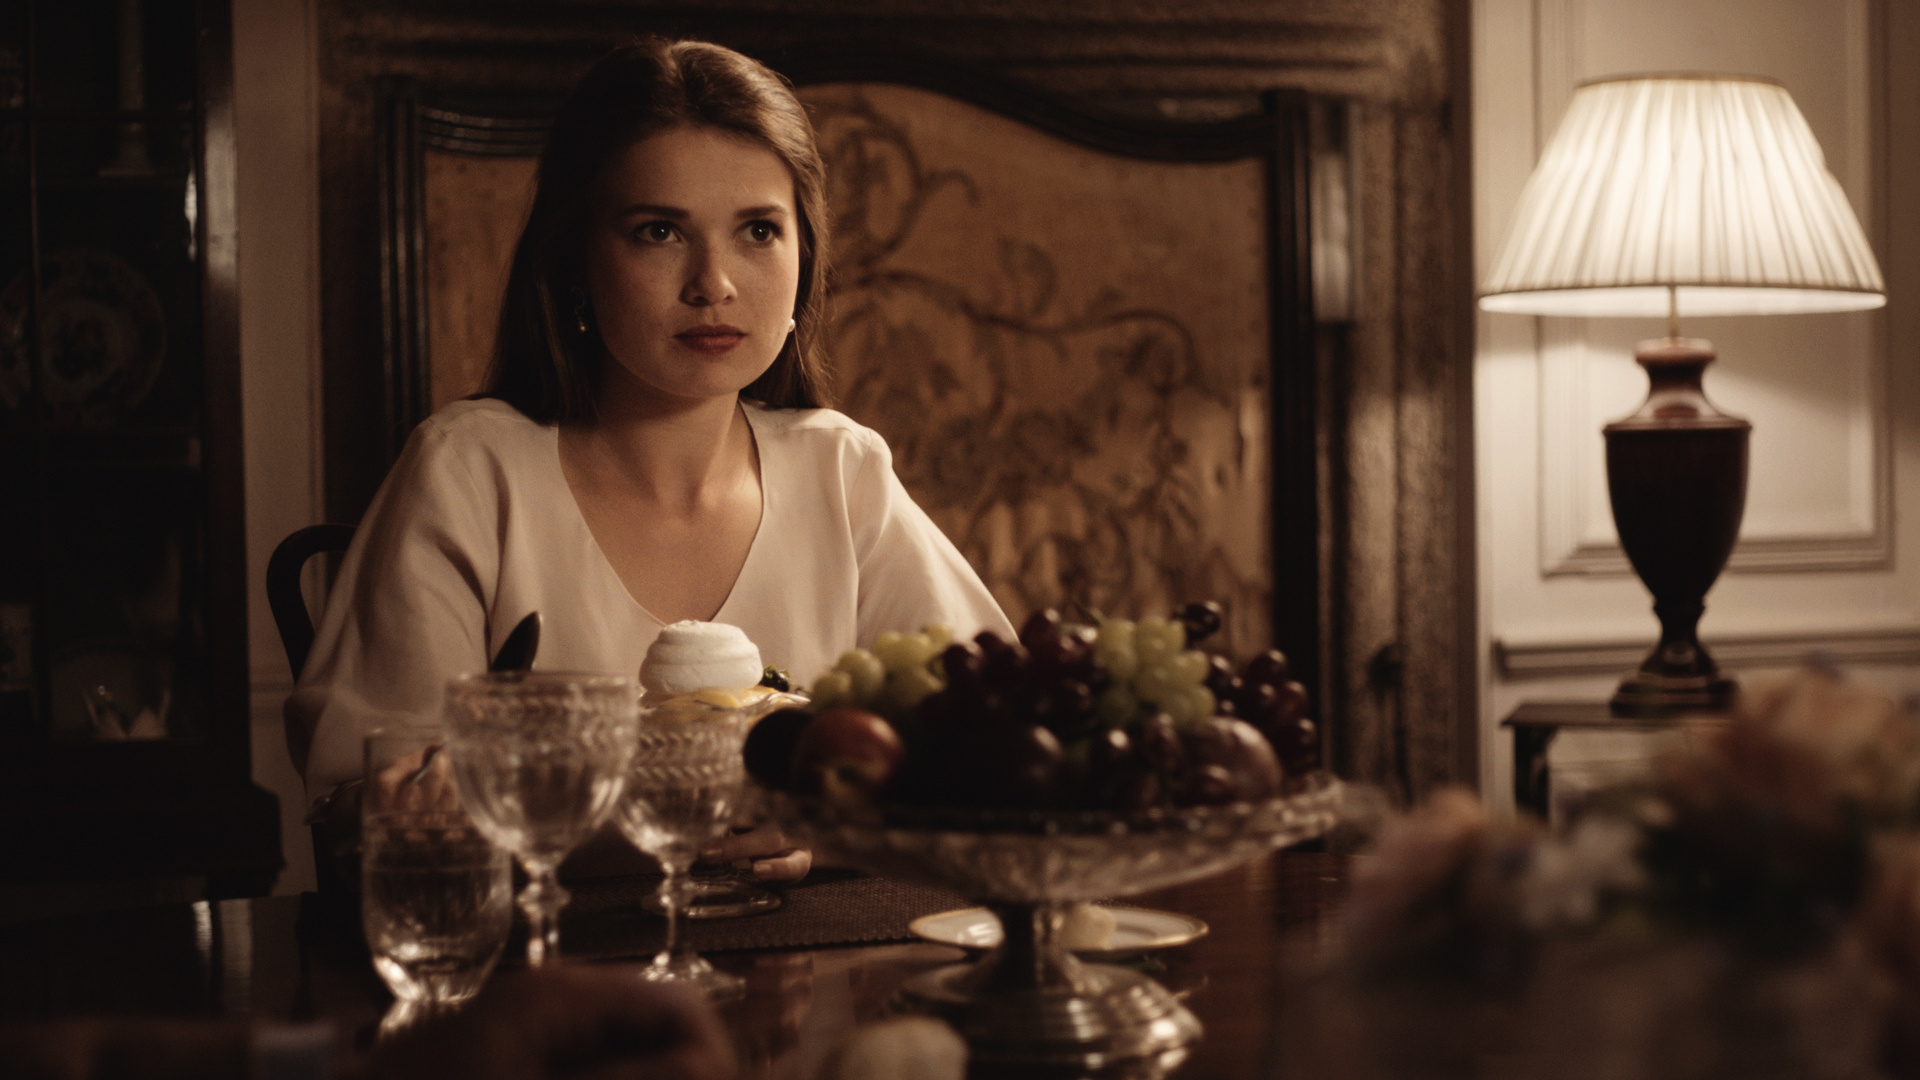
The two close-ups of the scene were shot simultaneously with two cameras. Light wise this is always a compromise, because both actors have to get some light. We changed the position of the Rifa Softlight for the close ups and placed it next to a practical.
Always think about where you have practicals, because this is the way how natural lighting works. You can see the light and you can use it to enhance it with an additional light source. For example if you have a Tungsten Practical, you can strengthen this light with an Artifical Tungsten Light.
A normal Tungsten Artifical Light has a Color Temperature of 3200K. But what’s happening, when you have your light on a dimer? When you dim this light, the Color Temperature of your Light is changing as well and is getting warmer. If you need less light you can use a scrim in front of your Light or you are using a simple ND gel in front of it. We used a Grid in front of the Rifa Light, which has the additional benefit, that your light shapes 45°. That means, without the Grid the light is not under control and has a wider range. With a Grid on your Light you can really control your light precisely and it only hits areas where you would like to have the light.
As mentioned before, we used a Softlight to intensify the Practical. You can clearly see it in her face, that the light shapes softly around her skin. With a hard light source, you would notice hard shadows around her face. You can also see, where the light comes from. I really like to add contrast to portraits, it’s way more interesting and moody. For this kind of effect I’m using my light meter and trying to get a ratio of 2 1/2 stops. This means when I have a F8 1/2 on the key side, I have a F4 on the fill side. The light was 45° in angle pointing to her.
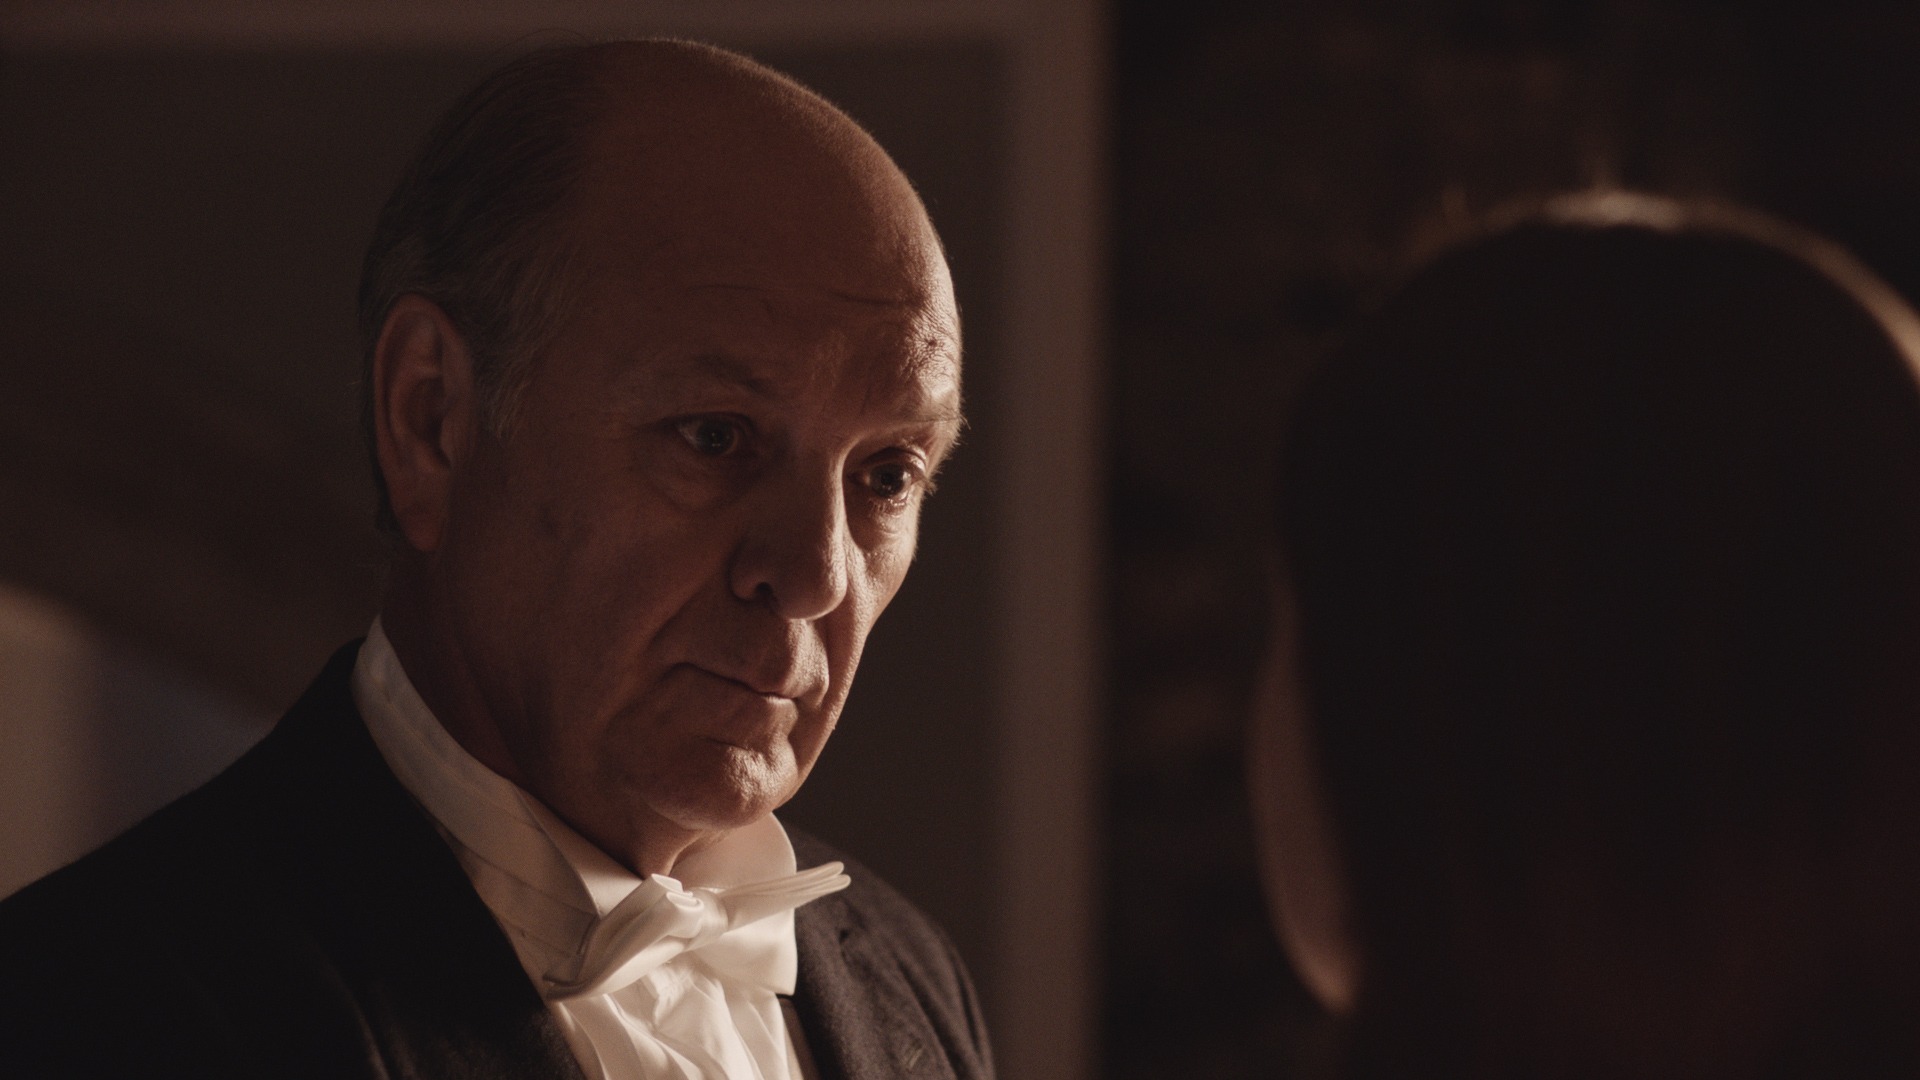
Our Actor Richard Walsh got the same Soft Light on his key side. A quite different angle of the light would have helped to improve the shot. That’s the downside when you are shooting in two light directions at the same time. There is always a compromise, just you and the Director have to decide if it’s worth it. Is it a very dramatic scene, are you working with Kids or is it just simple Time Pressure? You have to find solutions how you can make your schedule work.
Most Production Companies think you are faster with two cameras, but this is not really the case. Multiple cameras also means it’s getting more complicated. It takes more time to setup each shot. And the Actors have to stand on their marks perfectly. If they are just 2-3 inches away from their marks, it can happen that the shot isn’t working anymore. And Cut. Film-Equipment in Shot. That’s why we are always using a Dolly on Tracks and a Slider on a Tripod for Close-Ups. Sometimes you have to move the camera, because the Actor is not on his Mark. Shooting with two cameras also means, that you have to trust your B-Cam Operator enormously. You can’t really judge the picture coming from the B-Camera during a take, because as a DOP in Europe you also have to operate the A-Camera. My 1st AC Julian Hanschke is taking over the A-Cam several times, so I can concentrate more on lighting and framing in Video Village, but this is not always the case.
Just one last basic advice: Try to use the same stop of the lens, the same filtration (diffusion filters, ND, Polarizer), when you are shooting at the same time. This is quite important, otherwise the look and feel of the whole scene is different.


What's coming next?
I hope you enjoyed Part 2 of my Lighting Techniques Tutorial. It’s a lot of work. If you have any questions, please use the comment form below. I will reply to all of you! In the next part you will learn how to shoot and light an original night scene with more than two actors and light coming from outside through windows.
In case you’ve missed Part 1:
Lighting a Dark Interior Scene with Haze and Light Beams
If you’d like to be informed about it, please connect with me on my Social Media Streams: Instagram – Facebook – Twitter


Good work brother.Keep doing it 🙂
Thank you Tijo. I’m on it.
Can you explain about light meter reading in 1|3 stop
What exactly do you mean? Which one are you using? I have one from Seconic. I’m probably doing a Blog Post about using a Light Meter. It’s quite simple.
A blog post on how you use a light meter would be fabulous!
Really enjoying these lighting posts! Any chances for wishes? Would love to see a post about “People of #L 28” and the ZEISS shoot with the blacksmith!
yes, I’m working on it Sam. Wishes are always welcome. The Blacksmith one is on my list. Cheers.
If f8 1/2 mean…??
F 8 1/2 means it’s between F-Stop 8 and F-Stop 11. Sometimes it’s just called a 1/2 11.
Brother can you give us the what focal lenght lense your using for this both shots
not sure anymore, but I think it was a 32mm on the A-Cam for the wide shot and a 65mm or 85mm for both close ups.
Brother want to know more lighting setups about day extirior
Yes, I will do several exterior ones. But I need some time, as I’m doing this in my free time.
Means make next tutorial for exterior lighing for day not interior setups in your free time brother
Thankyou,
Next one will be an Interior one. But I will prepare some exterior ones as well. Thank you, Sebastian.
Waiting fot your next lighting setup brother
I prepared a lot of stuff right now, but I have to do the write up. Examples are ready, but I need some time. Probably doing an optional Paid Membership, so I can do this way more often and you get access to special content.
If your willing to make paid membership can you tell me the cost of the membership so that i can make those money
Thankyou,
I will offer three memberships. The starter one for €0,00 / month, which allows you access to one Tutorial each month. Then I will offer the Elite One, which will cost €8,95 / month, where you will have access to Two Tutorials each week and direct access to my On Set Video Logs starting April 2017. And you can cancel it monthly, if you want to. Sounds reasonable?
Really nice to read and watch, thanks Sebastian!
Are there more ‘blogs’ like these from other dops?
Kind regards,
The only one I know is Shane Hurlbut. But it’s paid content. I will also add paid content in the future, but at a reasonable price of 8,95€ each month with two Tutorials a week coming regularly. Thank you.
Try to make paid contest as soon as possible
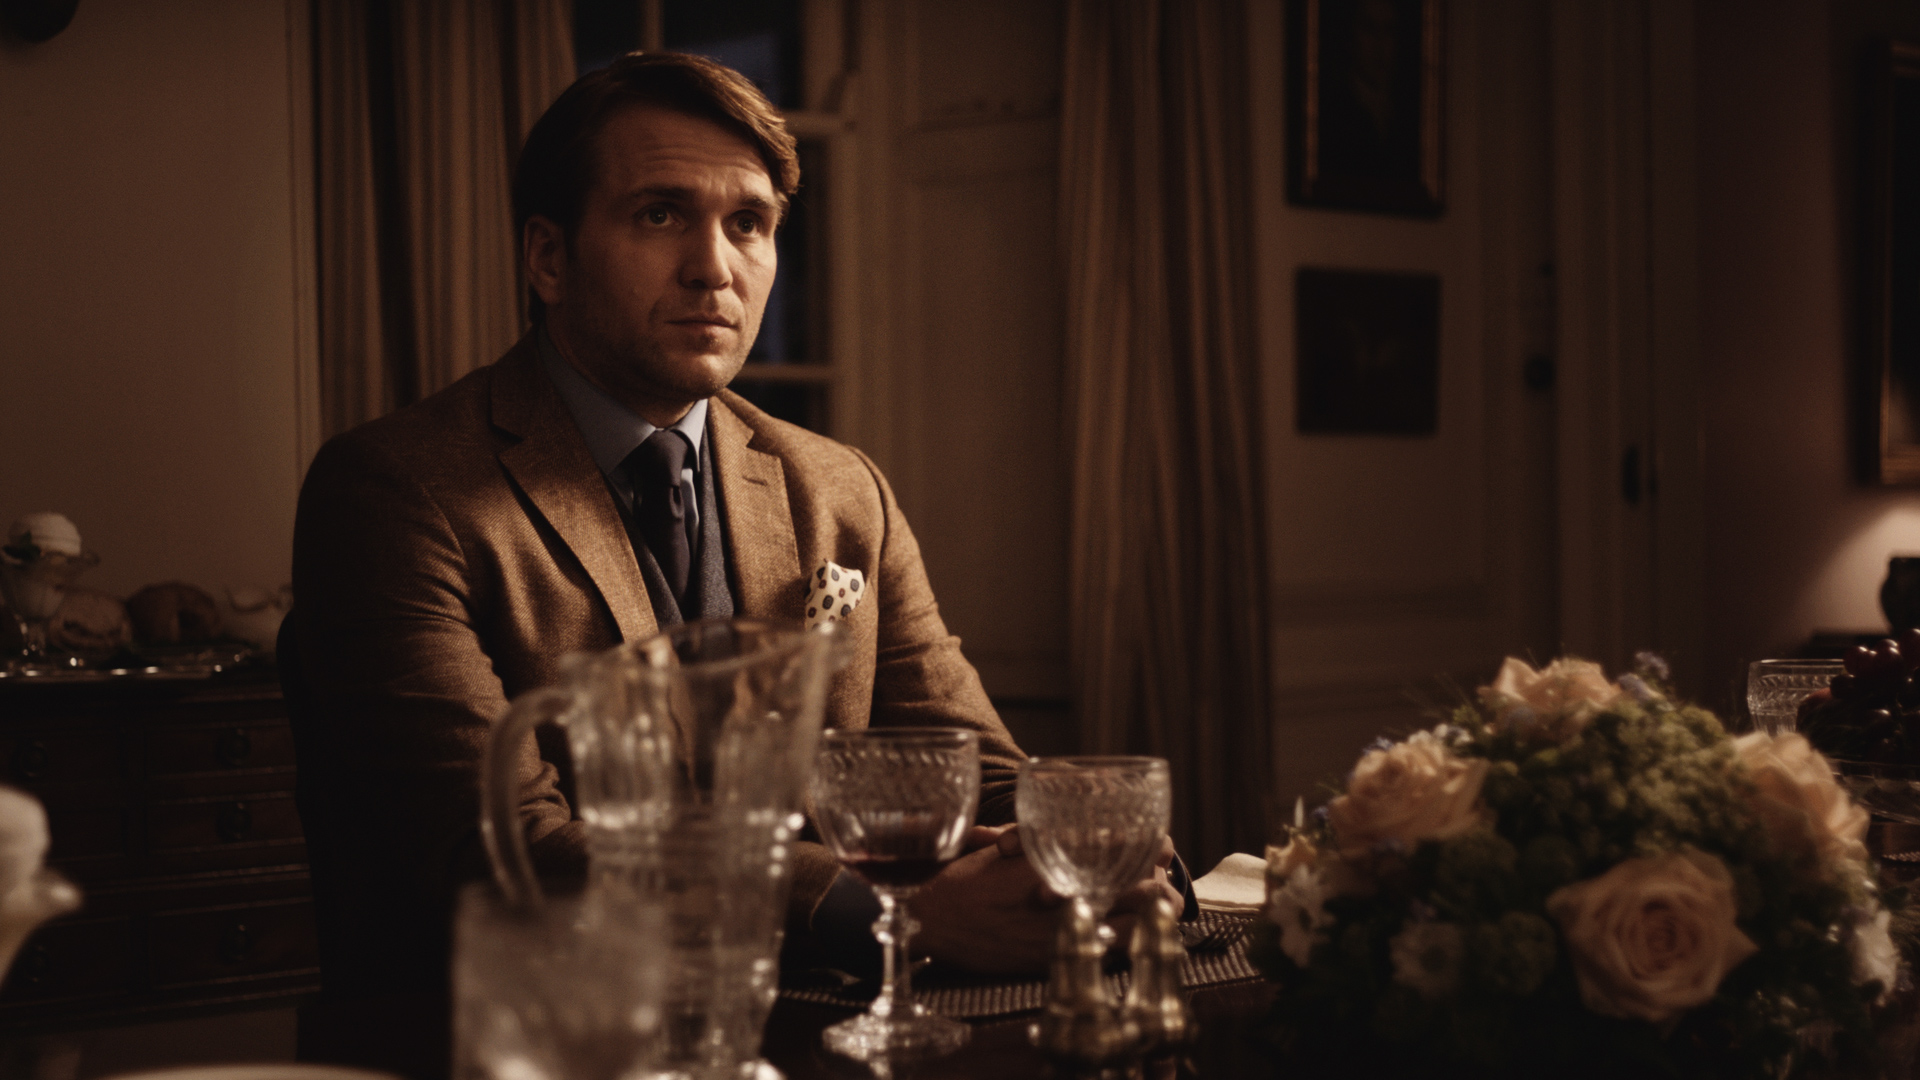
Awesome post! Thanks so much man. I’d love to see your setup for the dinner table night interior scenes on the slider at the bottom of this page. I love how well each subject is lit, and how they’re soloed out against the bg & their surroundings. Did you carefully flag off everything other than the subject? From the direction of shadow off the nose, it looks like the light wasn’t too high, so I’m confused as to how you kept the key light off the wall (referencing the single of the man & single of the woman at the table. Her key feels well exposed while light on her chair is minimal. How did you achieve this?
Thank you in advance!
Best,
Chris
Hi Chris, this will be my next Tutorial. As it is very time consuming and I’m doing this in my free time, I will offer those Tutorials in a Elite Membership Plan on my Weblog. For €8,95 a month you will get two Tutorials a week and On Set Video Logs starting April 2017. There will be also a Free Membership, but you will only have access to one Tutorial a month.
To help you with your specific question: We used a Grid on our Rifa Light for this shot. The good thing about a Grid is, that your light output is only in between 45 °. That means you can light very precisely. Hope this helped you! I will be always here for your question. And it won’t cost you money, but for this kind of Tutorials I have to charge a little bit, so I can justify it with my Family. I think you know what I mean! 😉
Sebastian
Thank you, very helpful!
Thanks so much for those lighting tutorials.
I would love it if you make a blogpost about lightmetering. As i read, you work with sekonic. can you get us some explanations about how to read light values and stuff? and how to meter your T Stop for exposing your camera? that would be great! 🙂 thanks
Incredibly informing. Thank you so much for your time and effort Sebastian!